Wednesday 30 June 2010

Knitted bed blanket

This is how my knitting began, here in Turkey where I live it tends to get very cold in the Winter, I couldn't find a purple throw or blanket to match my bedroom, so the obvious answer was to make one. In the past I have always sewed, making numerous clothes for the kids, the problem here was I couldn't even find the right material. my friend suggested I knit one!! well there was a challenge set for the Winter months....


Five Months later and now getting very tired of seeing purple wool it was finished, we did get to use it for a few weeks before the Summer arrived, but at least this Winter we are going to be nice and warm.


Boris the bear that my grandma made me when I was six and his friend Venice bear also got matching new outfits, looking very dapper I am sure you'll agree ;D

Knitted Pig Slippers

I simply have to put my Knitted pig slippers on my blog, believe it or not they are quite simple to make, a basic slipper and then abit of imagination :D


I love knitting up fun projects...


They started off as a basic slipper like this:


If anybody is interested in these I shall write down more about making them, you can make any animal you want once you have knitted up the base.

Alternative lace patterns

I think one of my favorite lace patterns must be (FF) Feather and Fan, looks like this:


Shall post another close up for you to see:


That's better, I used this pattern again on a vest top, as I live in a hot Country I tend not to put sleeves in, so here's me doing my best modelling pose in the top..


Feather and Fan (FF) [20 st rep]
*K1, [k2tog] 3 times, [yo, k1] 6 times, [k2tog] 3 times, k1* rep from * to *.

Top Lace Section
1: P across, working ribbing as est.
2: Rep FF patt, working ribbing as est.
3 and 4: Work ribbing as est and k all other sts.
Rep these four until top lace section measures 5 inches(12.7 cm), on the ribbing, ending with a row 4.
Next : BO 1 st, work 8 sts in rib, BO 82[82, 102] sts pwise, work 8 sts in ribbing, BO rem sts pwise.

Ribbing Pattern [Worked over 10 stitches]
P2, k2, p2, k2, p2.

Eyelet Ribbing [Worked over 10 stitches]
P2, ssk, yo, p2, yo, k2tog, p2.


Straps
Work both straps as follows: K3, p2, k3 until straps measure 10 ?Ó inches.
BO in rib patt.


Knitted Vest Top

I am a great fan of lace patterns, I have tried several lace patterns, so here's a vest top for you to try...


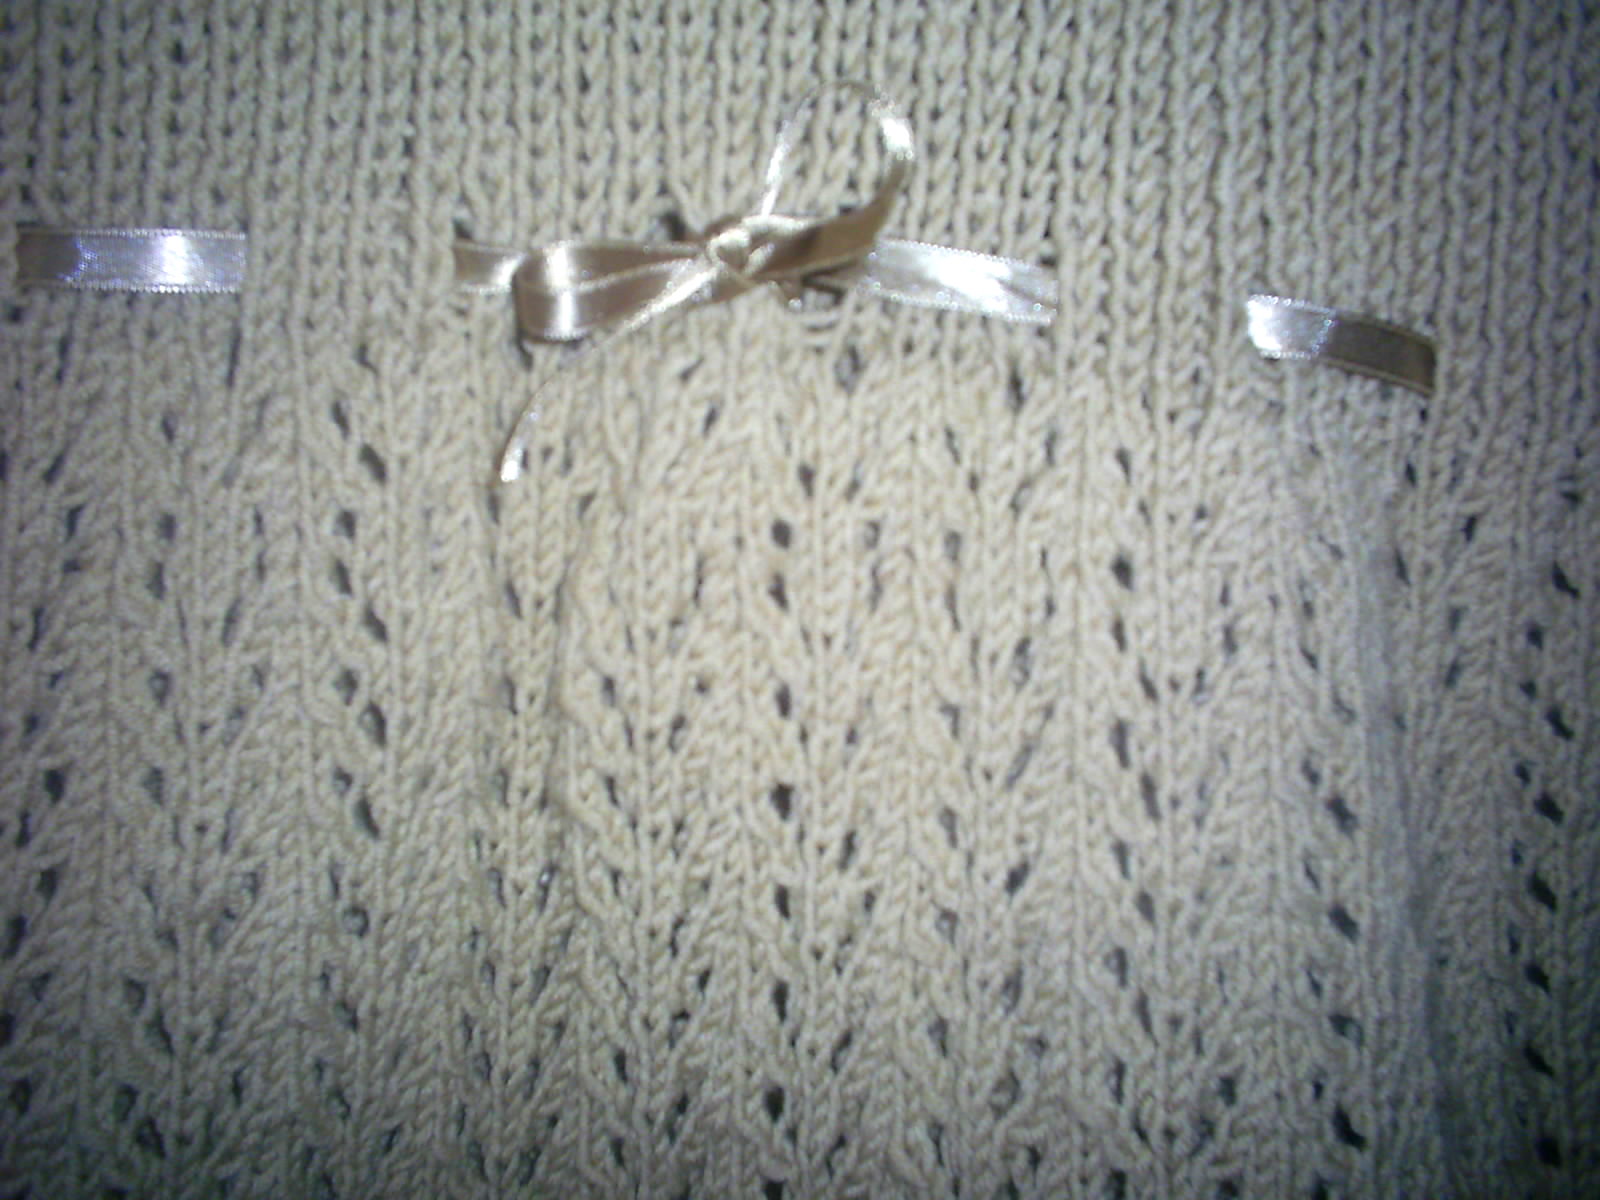
Close up of the lace....


Here's the pattern:

Materials
Patons Serenity DK (00004)
Pair each of 31/4 mm (UK 10) and 4 mm (UK 8)
needles.
150 cm of narrow ribbon.
Tension
20 sts and 31 rows to 10 cm (lace pattern), 20 sts and
28 rows to 10 cm (stocking stitch) on 4 mm needles or
size needed to achieve stated tension.
Check your tension before starting your garment. If
there are too many stitches to 10 cm, your tension is tight and you
should change to a larger size needle. If there are too few, your
tension is loose and you should change to a smaller size needle. It is
essential to work to the stated tension, and we cannot accept
responsibility for the finished product if any yarn other than the
specified yarn is used.

Abbreviations

alt=alternate; beg=beginning; cont=continue;
dec=decrease by working 2 sts together; foll=following;
inc=increase by working into front and back of st;
K=knit; meas=measures; P=purl; patt=pattern; sso=pass
slipped st over; rem=remain(ing); rep=repeat; RS=right
side; sL1K=slip 1 knitways; st(s)=stitch(es); stocking st=1
row K, 1 row P; tog=together; yfwd=yarn forward; 0=no
stitch, time or row to be worked in this size;
cm=centimetres; in=inches; mm=millimetres.

Instructions are given for the first size, with larger sizes
given in square brackets [ ]. Where only one figure is
given this applies to all sizes.

Instructions

Back
With 4 mm needles, cast on 93 [100, 100, 107, 114, 121] sts.
Lace patt thus:
Row 1 – (RS), K2, *K2tog, yfwd, K1, yfwd, sL1K, K1, psso, K2; rep from * to end.
Row 2 – Purl.
Row 3 – K1, *K2tog, yfwd, K3, yfwd,sL1K, K1, psso; rep from * to last st, K1.


Vest Top
Patons
To fit bust, approx
81 86 91 97 102 107 cm
32 34 36 38 40 42 in
Actual Size
85 91 95 101 107 111 cm
33.5 36 37.5 40 42 43.5 in
Length (approx)
56 57 58 59 60 61 cm
22 22.5 23 23 23.5 24 in
Patons Serenity DK (00004): 50g balls
5 5 5 6 6 6

Row 4 – Purl.
These 4 rows form lace patt

Cont in lace patt until Back meas 28 [29, 29, 30, 30, 31] cm,
ending with WS facing for next row.

Next row - (WS), P3 [5, 9, 7, 8, 5],P2tog, (P10 [9, 18, 16, 14,
10], P2tog) 7 [8, 4, 5, 6, 9] times, P to end (85 [91, 95, 101,
107, 111] sts).
Rib patt thus:
Row 1 - (RS), K0 [1, 1, 0, 1, 1], *P1, K1; rep from * to last 1 [0,
0, 1, 0, 0] st, P1 [0, 0, 1, 0, 0].
Row 2 - P0 [1, 1, 0, 1, 1], *K1, P1; rep from * to last 1 [0, 0, 1,
0, 0] st, K1 [0, 0, 1, 0, 0].
These 2 rows form rib patt.

Next row - (RS), rib 6 [9, 3, 6, 9, 3], yfwd, K2tog, *rib 6, yfwd,
K2tog; rep from * to last 5 [8, 2, 5, 8, 2] sts, rib to end.
Cont in rib patt until Back meas 36 [37, 37, 38, 38, 39] cm,
ending with RS facing for next row.
Shape armholes

Keeping rib correct, cast off 4 [5, 5, 6, 6, 7] sts at beg of next 2
rows (77 [81, 85, 89, 95, 97] sts).**
Dec 1 st at each end of next 5 [5, 5, 5, 7, 7] rows, then on foll 3
[4, 5, 6, 6, 6] alt rows (61 [63, 65, 67, 69, 71] sts).
Cont straight until armhole meas 15 [15, 16, 16, 17, 17] cm,
ending with RS facing for next row.

Shape back neck
Next row – (RS), patt 20 [20, 21, 21, 22, 23] sts, turn and
work this side first.
Dec 1 st at neck edge of next 8 rows, then on foll alt row (11
[11, 12, 12, 13, 14] sts).
Work 3 rows, ending with RS facing for next row.

Shape shoulder
Cast off 5 [5, 6, 6, 6, 7] sts at beg of next row.
Work 1 row.
Cast off rem 6 [6, 6, 6, 7, 7] sts.
With RS facing, rejoin yarn to rem sts, cast off centre 21 [23,
23, 25, 25, 25] sts, rib to end. Complete to match first side,
reversing shapings.

Front
Work as for Back to **.
Dec 1 st at each end of next 5 [5, 5, 5, 6, 6] rows (67 [71, 75,
79, 83, 85] sts).
Work 1 [1, 1, 1, 0, 0] row, ending with RS facing for next row.
Shape front neck
Next row – (RS), work 2 tog, rib 24 [25, 27, 28, 30, 31], turn
and work this side first.

Keeping rib correct, dec 1 st at neck edge of next 6 rows, then
on foll 3 alt rows, then on 2 foll 4th rows, then on foll 6th row
and at same time dec 1 st at armhole edge of 2nd and foll 1 [2,
3, 4, 5, 5] alt rows (11 [11, 12, 12, 13, 14] sts).
Cont straight until Front matches Back to start of shoulder
shaping, ending with RS facing for next row.
Shape shoulder

Cast off 5 [5, 6, 6, 6, 7] sts at beg of next row.
Work 1 row.
Cast off rem 6 [6, 6, 6, 7, 7] sts.
With RS facing, rejoin yarn to rem sts, cast off centre 15 [17,
17, 19, 19, 19] sts, rib to end. Complete to match first side,
reversing shapings.

MAKE UP
Press following instructions on ball band.
Join right shoulder seam.
Neck Border
With RS facing and using 31/4 mm needles, knit up 50 [50,
52, 52, 54, 54] sts down left side of front neck, 15 [17, 17, 19,
19, 19] sts from front, 50 [50, 52, 52, 54, 54] sts up right side
of front
neck, 14 sts down right side of back neck, 21 [23, 23, 25, 25,
25] sts from back, then 14 sts up left side of back neck (164
[168, 172, 176, 180, 180] sts).
Cast off knitways (on WS).
Join left shoulder and Neck Border seam.
Armhole Borders (Both alike)


With RS facing and using 31/4 mm needles, knit up 88 [90,
94, 96,
100, 102] sts evenly all round armhole edge.
Cast off knitways (on WS).
Join side and Armhole Border seams. Starting and ending
either side of centre front, thread ribbon through eyelet holes
near lower edge of rib section and tie ends in a bow.

Knitted Toys

My friend Bev is a Shaun the sheep fan so I found a photo of him and simply copied it, I made myself one as well as he was so cute.


I decided that the next one I would knit up I would double the thickness of yarn as he was abit see-through....


Here's a few more cuddleys I made ;)


Freaky pigs eyes went very scary!! but my husband David took pity on him and gave him a home next to his pc....


Tortoise...

Knitted Shorts


If you knit then you might as well knit for fun as well, ok so these shorts may not be every bodies idea of discreet but I love em!!!


These pink shorts are so comfortable and very quick and easy to knit up.

Pattern
Stitches: knit 2, purl 2.

Needles: One pair #8 strait knitting needles, D3.25 crochet hook.

Gauge: 14 sts and 22 rows=4"

Finished size: S(M,L)

Hip size: 36(39,42)"

Length: 11 (12 , 13 ) "

Directions:

Leave long tale of yarn at the beginning.

Cast on 54(58,62) sts. Knit 1 row in 2X2 rib pattern. At the second row increase 1 st at both ends 2X. 58(62,66) sts are on the needle. Knit 11 (12,13)". Bind off all sts. Make 2 pieces. Each piece is half Front and half Back.

Finishing:

The wrong side out, sew or crochet the crotch (the increased part of the shorts). Do the same with the other leg. Turn one leg right side out, and insert it into the first leg which is wrong side out. The right side of the legs will be facing each other. Match the two inside leg seams, and pin the crotch area for stitching to the waist. Do the same for the other seam, and stitch it from crotch to waist.

Crochet a rope for the waist. Pull the rope through every 2 sts, tie a bow in the front. Finish the ends of the rope with two wooden beads.

Knitted Bikini


Summers here so lets get knitting those bikinis....swimming in them is not recommended though!!!

pattern...

Instructions for bra top are written for A-cup size. Any changes for B- and C-cup sizes are written in brackets. If there is only one figure it applies to all sizes. Bottoms are one-size. Standard abbreviations are used. Recommended for knitters and crocheters with some experience.

You need:
1 hank Butterfly Super 10 (125 g) pure cotton yarn, No. 3401 Orange
One pair of 4.5 mm needles OR whichever needles you require to produce the tension given below
One 4.25 mm crochet hook
Stitch markers
Tapestry needle
Clear elastic knitting thread
12.5 cm (5 ins) square of swimsuit lining in desired colour (optional)
Matching thread (optional)

Tension:
20 sts and 26 rows = 10 cm (4 ins) in stocking stitch. Work to exact tension with specified yarn to obtain satisfactory results. TO SAVE TIME, TAKE TIME TO CHECK TENSION.

To make:


BRA CUP (make 2):
With knitting needles, cast on 29(33,37) sts.
Row 1 (right side): Knit.
Row 2: Purl.
*Row 3: K1, sl1, k1, psso, knit to last 3 sts, k2tog, k1. 27(31,35) sts now on needle.
Row 4: Purl.
Row 5: Knit.
Row 6: Purl.
Rep from * 4(6,8) times more, ending with right side facing for next row. 19 sts now on needle.
**Next row: K1, sl1, k1, psso, [yo, k2tog] to last 2 sts, k2tog. 17 sts now on needle.
Next row: Purl.
Rep from ** 6 times more, ending with right side facing for next row. 5 sts now on needle.
Next row: Purl.
Next row: K1, sl1, k2tog, psso, k1. 3 sts now on needle.
Next: P3tog (top point of cup), sl rem st onto crochet hook and, with right side facing, ch 3, work 20(24,28) hdc evenly down first side edge, ch 3 at corner, work 21(25,29) hdc evenly across bottom edge, ch 3 at corner, work 20(24,28) hdc evenly up second side edge, then sl st to 2nd ch of first ch 3, fasten off.

BRA TOP
With right side facing, sl st to ch 3 sp at bottom right-hand corner of first cup, then [ch 3, hcd] in same sp, hdc in each st along bottom edge to left-hand corner, ch 5, hdc in ch 3 sp at bottom right-hand corner of second cup, then hdc in each st along bottom edge of second cup to last st, 2 hdc in ch 3 sp at bottom left-hand corner of second cup, ch 3, turn.
Row 2: 2 hdc in first ch 3 sp, hdc in each st to last st, 2 hdc in last ch 3 sp, ch 3, turn.
Row 3: 2 hdc in first ch 3 sp, hdc in each st to last st, 2 hdc in last ch 3 sp, then work chain st to create strap 52 cm (20-1/2 ins) long, fasten off.
Sl st to first st on outside corner of rem cup, then work same-length strap in same manner.

BOTTOMS
Cast on 41 sts (front top edge).
*Row 1 (right side): K1, sl1, k1, psso, [yo, k2tog] to last 2 sts, k2tog. 39 sts now on needle.
Row 2: Purl.
Rep from * 4 times more. 31 sts now on needle.
Work St st, dec 1 st at each end of needle on every alt row 8 times, place marker. 15 sts now on needle.
Work even in St st until crotch from marker measures 12.5 cm (5 ins) or desired length, ending with right side facing for next row.
Work St st, inc 1 st at each end of needle on every row 23 times, place marker. 61 sts now on needle. (Note: If desired, widen and lengthen back by inc number of sts in rows, taking into consideration that crocheted edging will add 1 cm/3/8 in at each edge.)
Work even in St st until back from marker measures 19.5 cm (7-1/2 ins), cast off to last st, sl rem st onto crochet hook and, with right side facing, ch 3, work 62 hdc evenly along first side edge, ch 3 at corner, work 31 hdc evenly across top front edge, ch 3 at corner, work 62 hdc evenly along second side edge, ch 3 at corner, work 40 hdc evenly across top back edge, sl st to 2nd ch of first ch 3, then work chain st to create strap 39.5 cm (15-1/2 ins) long, fasten off.
One at a time, sl st to each rem corner on front and back, then work same-length strap in same manner.

To finish:
Using elastic, hand-sew line of running sts just inside each side edge of cups and bottoms. If desired, cut lining (having greatest stretch from front to back) piece about 6 mm (1/4 in) larger than crotch around edge, press under 1 cm (3/8 in) around edge; with matching thread, slipstitch in place to wrong side.

Knitting Abbreviations

When I started knitting I was so daunted by all the symbols and abbreviations, in fact they are not so hard when you discover what they mean, so here's a list to help anybody who feels they are reading a foreign language!!

alt alternate
beg begin/beginning
bet between
BO bind off
CA color A
CB color B
CC contrasting color
cm centimeters
cn cable needle
CO cast on
cont continue
dec decrease/decreases/decreasing
dpn double-pointed needle(s)
fl front loop(s)
foll follows/following
g gram
inc increase
K knit
k2tog knit two together
K2tog tbl (knit 2 together through back loop)
kwise knitwise
LH left hand
lp(s) loop(s)
m meters
M1 make one stitch
M1 p-st make one purl stitch
MC main color
mm millimeters
oz ounce
P (or p) purl
pat(s) or patt pattern(s)
pm place marker
pop popcorn bobble
p2tog purl two together
prev previous
psso pass slipped stitch over
pwise purlwise
rem remain/remaining
rev St st reverse stockinette stitch
RH right hand
rnd(s) round(s)
)rep repeat(s
sk skip
skp slip, knit, pass slipped stitch over
sl slip
sl1k slip one knitwise
sl1p slip one purlwise
sl st slip stitch(es)
ss slip stitch (in Canadian patterns)
ssk slip, slip, knit those two stitches together
sssk slip, slip, slip, knit three slipped stitches together
sk2p slip one stitch, knit two together, pass slipped stitch over
st(s) stitch(es)
St st stockinette stitch
tbl through back loop
tog together
WS wrong side
wyib with yarn in back
wyif with yarn in front
yds yards
yfwd yarn forward (yarn over)
yo yarn over
yrn yarn around needle (yarn over)
yon yarn over needle (yarn over)
yo yarn over
[ ] work instructions in brackets as many times as directed
( ) work instructions in parenthesis as directed (also used to indicate size changes)
** repeat instructions after asterisks as directed
* repeat pattern following asterisk as directed


Albem bag pattern


Now for another bag, this one is called , Albem...


I did have knitted handles on the bag as the pattern indicates, but I decided to change them for leather ones. Beautiful bag to knit and alot of fun...

Skill level: Intermediate
Albem is a cabled bag with knitted handle, tassels and a button closure.

One size
FINISHED MEASUREMENTS
Approximately 10” across x 10” high (Not including strap)
MATERIALS
3 Hanks BERROCO ULTRA ALPACA (100 grs), #6285 Oceanic Mix
Straight knitting needles, sizes 10 (6.00 mm) and 10 1/2 (7.00 mm)
Crochet hook, size 3.50 mm (E)
1 Cable needle (cn)
One 1 1/2” button
NOTE
There are no gauge requirements for this project.
STITCH GLOSSARY
CB4

Sl 2 sts to cn and hold in BACK, k2, then k2 from cn
CABLE PATTERN (Multiple of 10 sts + 4)
Row 1 (RS): K1, * k2, p2, k4, p2, rep from * across, end k3.
Row 2: K1, k the k sts and p the p sts as they face you to last st, end k1.
Row 3: K1, * k2, p2, CB4, p2, rep from * across, end k3.
Row 4: Rep Row 2.
Rep these 4 rows for Cable Pat.
FRONT
With larger straight needles, using 2 strands of yarn held tog, cast on 44 sts. Work even
in Cable Pat for 8”, end on RS. Bind off, decreasing 12 sts across.
BACK
Work same as front for 8”, end on WS. Knit the next row, decreasing 8 sts across – 36
sts. Knit 1 row more.
Flap: Follow Chart until 22 rows have been completed, end on WS – 22 sts. Bind off.
STRAP/GUSSET
With smaller straight needles, using 2 strands of yarn held tog, cast on 9 sts.
Row 1 (RS): K1, * p1, k1, rep from * across.
Row 2: P1, * k1, p1, rep from * across. Rep these 2 rows until piece measures 50”,
end on WS. Bind off in ribbing.
FINISHING
Sew cast-on and bound-off ends of Strap/Gusset tog being careful not to twist. Placing
seam at center of lower edge, sew side edges of Strap/Gusset to lower and side edges of
back and front leaving remaining edge free for strap. Sew side edges of strap tog
forming a tube.
Edging: With RS facing, using crochet hook and 2 strands of yarn held tog, beg at side,
work in Reverse sc around seam joining gusset and front of bag, working through double
thickness, then across top of bag, join with a sl st in first sc. Fasten off. Work in same
manner around seam joining gusset and back of bag, then around outer edge of flap, join
with a sl st in first sc. Fasten off. Fold flap down, then work in Reverse sc across fold,
working through double thickness of flap and bag. Fasten off.
Tassels (Make 4): Cut one 8” long strand of yarn and one 12” long strand of yarn.
Wrap yarn multiple times around a 3” long piece of cardboard. Cut the lower end to free
wrapped strands. Tie the center of strands with 8” long strand. Fold strands in half over
tie and wrap 12” long strand around all strands 1” down from top. Tie and draw ends
into center of tassel. With crochet hook, join single strand of yarn in top of first tassel,
make a chain 18” long, join in top of second tassel. Fasten off. Repeat with third and
fourth tassels. Tie one chain around each side of strap as in photo. With crochet hook,
join single strand of yarn in WS of flap edging 3/4” to the left of center. Make a chain 1
1/2” long, then join in WS of flap edging 3/4” to the right of center forming buttonloop.
Sew button to front of bag under buttonloop.

Bags of fun!

A big HELLO to all my fellow knitters... quick introduction...my name is Linda I am an expat living in Turkey, never thought I would see the day I sat down with knitting needles and got excited!!! knitting was for old people and after all I'm only 46!!! but No not anymore I have become a human knitting machine scanning the internet at every opportunity trying to find new and exciting projects to knit...why did I start knitting...because I got bored and oh cold in the Winter, I needed new jumpers, because I am so lanky and long I couldn't find one to fit, knitting one seemed the obvious answer....
Ok enough waffle and on with the blogging, BAGS OF FUN.....

Brea Bag

I finished knitting this bag last night, got to admit the round metal hoops that I used to attach the handle is actually key rings!! you have to learn how to improvise where I live....

PATTERN

Brea Bag knit in Ultra™ Alpaca
Skill level: Intermediate
The front and back of our crescent shaped bag are each comprised of four segments of
a hexagon, knit from the outside in. A simple cable pattern repeated four times
combines to resemble a lotus flower.
One size
SIZE
Approximately 11” across x 7” high x 2 1/2” deep (Not including handle)
MATERIALS
2 Hanks BERROCO ULTRA ALPACA (100 grs), #6275 Pea Soup Mix
Straight knitting needles, size 9 OR SIZE TO OBTAIN GAUGE
Crochet hook, size 4.00 mm (F)
Cable needle (cn)
1 Leather handle from M&J Trimmings
One 1 1/2” button
Tapestry needle
GAUGE
14 sts = 4”; 20 rows = 4” in Moss St with 2 strands of yarn held tog on size 9 needles
TO SAVE TIME, TAKE TIME TO CHECK GAUGE
STITCH GLOSSARY
CF5
Sl 2 sts to cn and hold in FRONT, k2, p1, then k2 from cn.
CB4
Sl 2 sts to cn and hold in BACK, k2, then p2 from cn.
CF4
Sl 2 sts to cn and hold in FRONT, p2, the k2 from cn.
MOSS STITCH (Even number of sts)
Rows 1 and 2: * K1, p1, rep from * across.
Rows 3 and 4: * P1, k1, rep from * across.
Rep these 4 rows for Moss St.
NOTE
You will decrease 8 sts on every RS row of Pat St until there are 6 sts remaining.
PATTERN STITCH
Row 1 (RS): * K2 tog, p1, (k1, p1) 3 times, k2, p2, k2, p1, k2, p2, k2, (p1, k1) 3
times, p1, SSK, rep from * 3 times more.
Row 2 and all WS rows: K the k sts and p the p sts as they face you.
Row 3: * K2 tog, (p1, k1) 3 times, k2, p2, k2, p1, k2, p2, k2, (k1, p1) 3 times, SSK,
rep from * 3 times more.
Row 5: * K2 tog, p1, (k1, p1) twice, k2, p2, CF5, p2, k2, p1, (k1, p1) twice, SSK, rep
from * 3 times more.
Row 7: * K2 tog, (p1, k1) twice, k2, p2, k2, p1, k2, p2, k2, (k1, p1) twice, SSK, rep
from * 3 times more.
Row 9: * K2 tog, p1, k1, p1, k2, p2, k2, p1, k2, p2, k2, p1, k1, p1, SSK, rep from * 3
times more.
Row 11: * K2 tog, p1, k3, p2, CF5, p2, k3, p1, SSK, rep from * 3 times more.
Row 13: * K2 tog, p1, k2, CB4, p1, CF4, k2, p1, SSK, rep from * 3 times more.
Row 15: * K2 tog, CB4, p5, CF4, SSK, rep from * 3 times more.
Row 17: * K2 tog, k1, p9, k1, SSK, rep from * 3 times more.
Row 19: * K2 tog, p9, SSK, rep from * 3 times more.
Row 21:* K2 tog, p7, SSK, rep from * 3 times more.
Row 23: * K2 tog, p5, SSK, rep from * 3 times more.
Row 25: * K2 tog, p3, SSK, rep from * 3 times more.
Row 27: * K2 tog, p1, SSK, rep from * 3 times more.
Row 29: * Sl 2 tog knitwise, k1, psso, rep from * 3 times more.
BAG BACK
With straight needles, using 2 strand of yarn held tog, cast on 126 sts. Purl 1 row.
Keeping 1 st at each side in St st, work remaining sts in Pat St until 29 rows have been
completed, end on RS – 6 sts. Break off yarn leaving a 6” end. Thread end into
tapestry needle and draw through all sts on needle. Pull up tightly and secure. This
point is center of top back edge.
BAG FRONT
Work same as bag back.
GUSSET
With straight needles, using 2 strand of yarn held tog, cast on 8 sts. Work even in Moss
St for 18 rows, end on WS.
Inc Row (RS): Work 1, M1, work to last st, M1, work 1 – 10 sts. Work 7 rows even,
then rep Inc Row, working incs into Moss St – 12 sts. Mark beg and end of last row.
Work even until piece above markers reaches from right top corner of bag back around
outer edge to left top corner, end on WS. Mark beg and end of last row.
Dec Row (RS): Work 1, k2 tog, work to last 3 sts, work 2 tog, work 1 – 10 sts. Work
7 rows even, then rep Dec Row – 8 sts. Work even for 18 rows, end on WS. Bind off.
FINISHING
With RS facing, using crochet hook and 2 strands of yarn held tog, work in Reverse Sc
along top edges of bag back and front. Sew side edges of gusset to bag back and front
matching markers at each end of gusset with right and left top corners of bag. Fold
ends of gusset before and after markers to WS over ends of handle and sew in place.
Buttonloop: With RS facing, using crochet hook, join 2 strands of yarn held tog in
center top edge of bag back. Ch 15, join with a sl st in first ch forming a loop. Work 10
Reverse Sc’s in loop, join with a sl st in first sc. Fasten off. Sew button to center front
of bag 1” down from top edge.

Hope you enjoy knitting this bag, I thought it was going to be difficult, but although abit fiddly I really recommend you knit it, enjoy :D